Hey besties! So, you’re having trouble accessing your router settings using the address 192.168.3.1? Don’t you worry, I’ve got you covered. Let’s dive into the potential causes and solutions for this common issue.
Possible Causes for the Issue
There are five main areas where accessing the router settings via 192.168.3.1 might fail. Let’s take a look at each one:
(1) Incorrect Local IP Configuration on your Computer
If the local IP of your computer was previously configured incorrectly, it could prevent you from logging into the router. The solution is to set your computer’s IP address to be obtained automatically. Here’s how to do it on Windows 10:
- Right-click the ‘Start’ button in Windows 10 and open ‘Network Connections’.
- Next, right-click ‘Local Area Connection’ and choose ‘Properties’.
- Then, select ‘Internet Protocol Version 4 (TCP/IPv4)’ and click on ‘Properties’.
- Finally, select ‘Obtain an IP address automatically’ and ‘Obtain DNS server address automatically’, then click ‘OK’.
If your computer’s IP address is already set to default auto-obtain, you can ignore this issue.
(2) Router Connection Issue
Ensure that your computer, modem, and router are properly connected. Here’s how the connection should be:
- The external phone line or fiber should be connected to the modem.
- The modem should be connected to the router’s WAN port using a network cable.
- For laptops or phones, connect to the router using WiFi.
- For desktops, connect a network cable to the router’s LAN port.
(3) Network Cable Problem
A faulty network cable can prevent you from opening the router login page. Make sure the cable is in good working condition. If you have a spare cable at home, try replacing it with one that is intact and securely connected. You can also check the network status icon in the bottom-right corner of your computer or use the ‘Ping 192.168.3.1’ command to verify the connection.
(4) URL Input Error in Browser
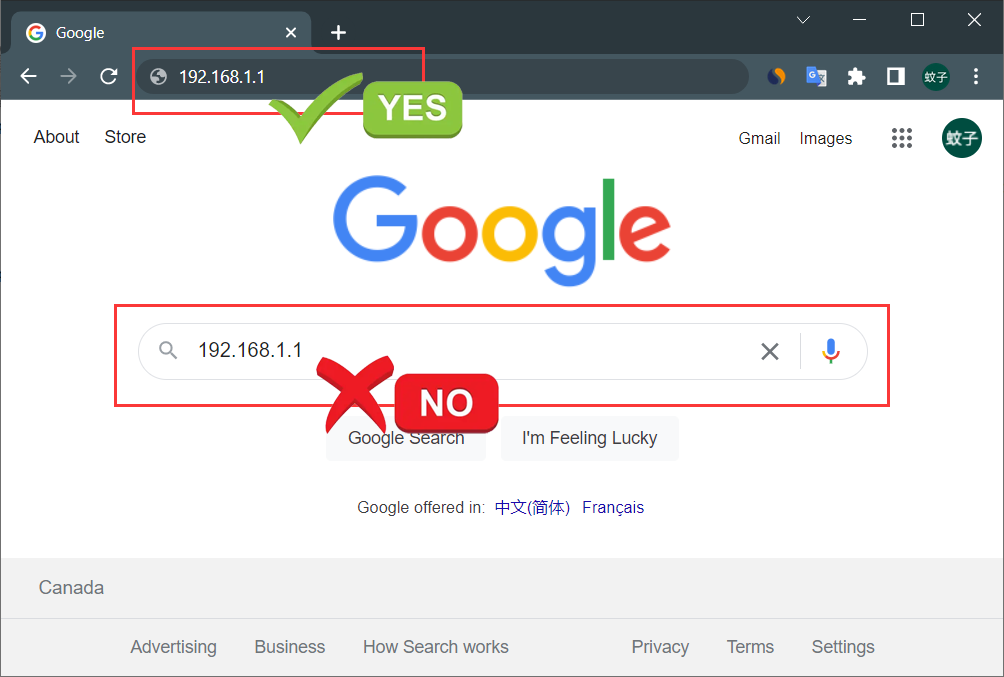
Many browsers have a large search box on their homepage. People often mistakenly enter the address 192.168.3.1 into this search box, which won’t lead to the router login page. Instead, enter 192.168.3.1 in the browser’s address bar, located at the very top, where website addresses are displayed. This ensures that the browser directly navigates to the router’s login page. Here’s an image to show you the correct location:
(5) Router Settings Issue
Not all routers have 192.168.3.1 as their default login website. Different brands and models may have different login addresses. So, it’s essential to confirm whether your router’s IP address is actually 192.168.3.1. You can find this information on the label at the bottom of the router.
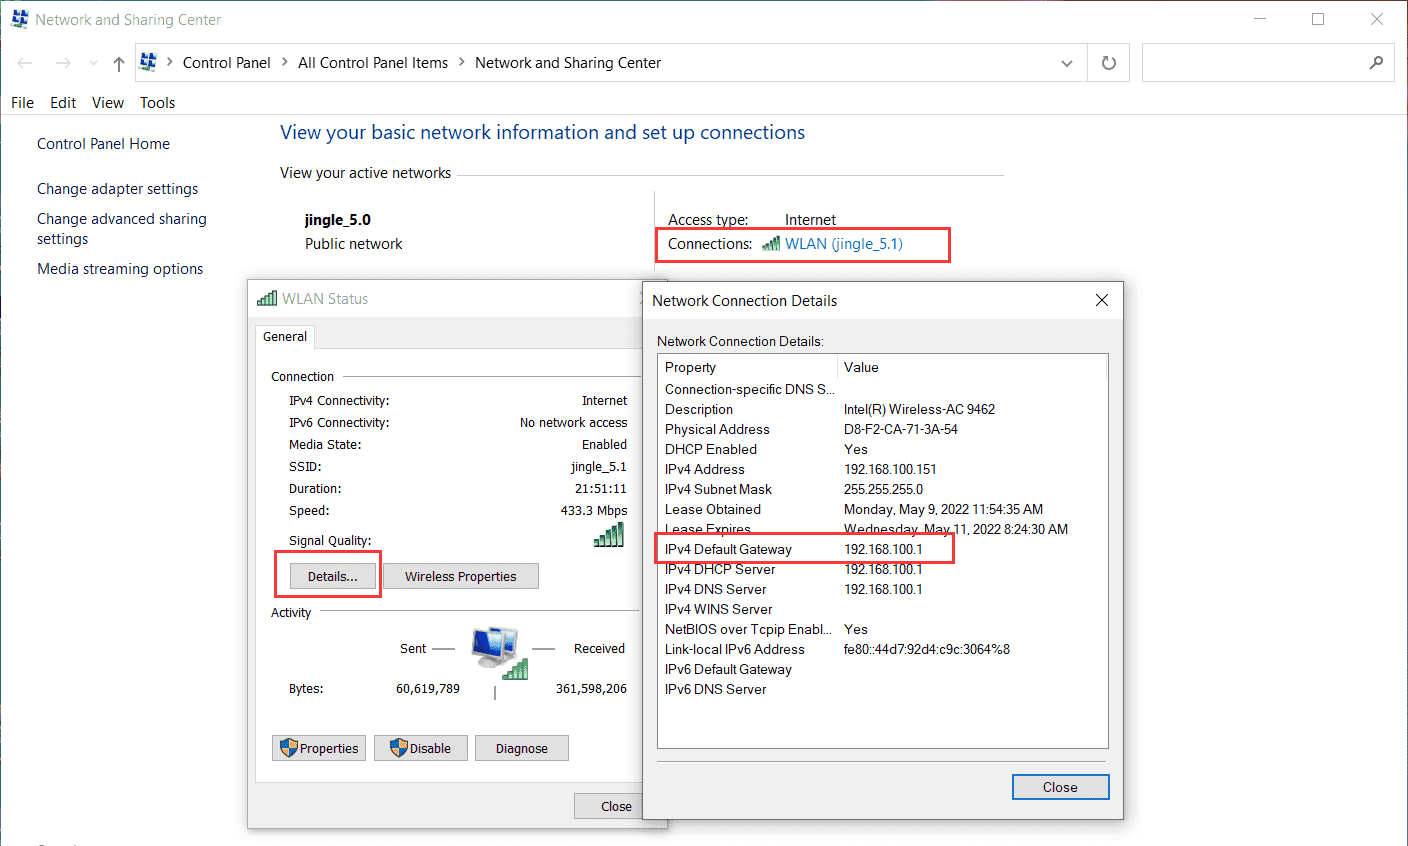
Another possibility is that the router’s default IP address has been modified for increased security. In this case, 192.168.3.1 will no longer be the valid login address. To determine the real login address of your router, follow these steps:
- Right-click the ‘Start’ button on Windows 10 and open ‘Network Connections’.
- Right-click ‘Local Area Connection’ and select ‘Status’.
- Click on ‘Details’.
- Look for the ‘IPv4 Default Gateway’ in the details page, which indicates the current login IP of the router.
Conclusion
These are the common causes and solutions when 192.168.3.1 fails to open the router settings page. If none of these steps resolve the issue, you may consider resetting the router to its factory settings before attempting to log in again. For guidance on resetting the router, refer to our article on “How to restore the factory settings of routers using 192.168.3.1 as the login address?”.
Stay connected, and happy troubleshooting, besties!

