Are you tired of slow internet speeds or outdated WiFi settings? Well, fret no more because we have the solution for you! The Tenda Router Control Panel allows you to customize your WiFi network, change passwords, create guest networks, set up firewalls, and so much more. It’s like having complete control over your internet connection.
But before we dive into the exciting world of Tenda Router settings, let’s understand how to access the Tenda Router Control Panel.
How to Login to Tenda Router?
Follow these simple steps to easily log in to your Tenda Router Control Panel:
- Grab your PC and open a web browser of your choice.
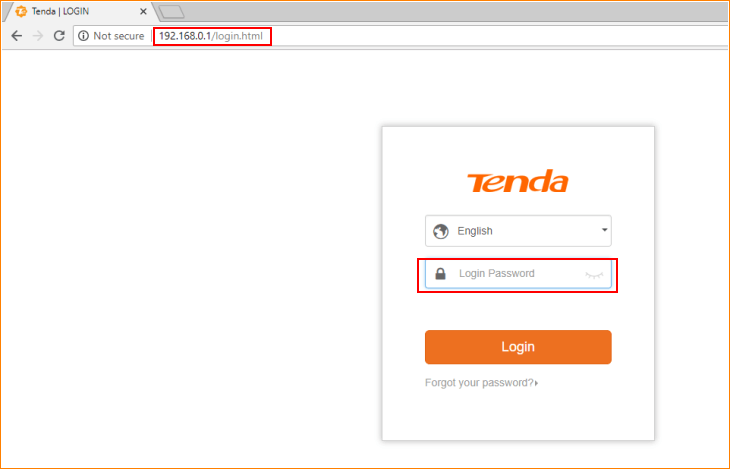
- In the address bar, type in the default gateway address for your Tenda router:
http://192.168.0.1, and hit Enter. - Voila! You have reached the login page of your Tenda router. Here, you will find the username and password fields.
- The default username for Tenda Router is: admin
- The default password for Tenda Router is: admin
- Enter the login credentials and press the Enter key.
- Congratulations! You are now logged in to the Tenda Router Control Panel. From here, you can make changes to different settings of the router, tailor it to your needs, and enjoy an optimized internet connection.
Change SSID of Tenda WiFi Network
If you wish to change the password of your Tenda WiFi network, the Control Panel is the place to do it. Follow these steps to easily change the SSID of your WiFi network:
- Log in to the Control Panel of your Tenda router using the aforementioned method.
- Once logged in, head to the Home page and click on Wireless from the left column.
- On the next page, locate the Network Name (SSID) option. Your current SSID will be displayed next to this label.
- Enter your desired SSID in the Network Name (SSID) field.
- Click on Apply to save the settings. Your router will reboot, and upon reboot, the SSID will be changed as per your preference.
Change Password of Tenda WiFi Network
Similar to changing the SSID, altering the password of your Tenda WiFi network can be done through the router’s control panel. Here’s what you need to do:
- Log in to the router Control Panel using the method mentioned earlier.
- Once logged in, navigate to the Home page and click on Wireless from the left column.
- Ensure that the encryption is set to WPA2-PSK for maximum security.
- Look for the WPA Pre-Shared Key field. Enter your new WiFi password here, consisting of 8-63 characters, including alphabets, digits, and special symbols.
- After entering your new WiFi password, click on Apply to save the changes.
- Your router will reboot. Upon reboot, connect to the WiFi network using the new password, and experience an enhanced and secure connection.
With the Tenda Router Control Panel, you have complete control over your WiFi network. Customize it, secure it, and enjoy a seamless internet experience. So, go ahead, dive into the Tenda Router settings, and unlock the true potential of your internet connection.
