Are you struggling to navigate your Belkin router’s web-based admin interface? Look no further! In this guide, we’ll walk you through the simple steps of accessing and changing the WiFi settings of your Belkin router. So, grab your favorite beverage and let’s get started!
How to Login to Belkin Router?
Before we dive into the intricacies of accessing the web-based interface of your Belkin router, there’s a small prerequisite. Make sure your PC is connected to the router. Once you’ve checked that, the rest is a piece of cake.
Here’s how to log in and access the Belkin Router web-based interface:
-
Ensure that your router is powered on and running smoothly. Connect your PC to the router either using an ethernet cable or wirelessly through the WiFi network.
-
Once your PC is connected to your Belkin router, launch your favorite web browser.
-
Open a new tab and enter either “https://router” or the default IP address of your router, which is “192.168.2.1,” into the address bar. Then, press Enter.

-
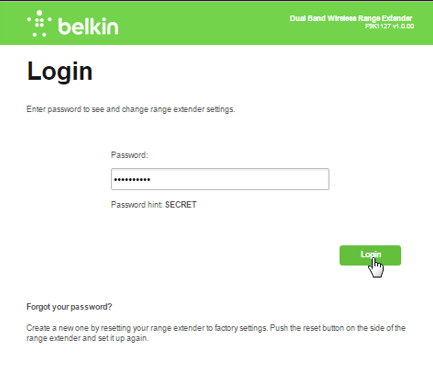
You’ll be redirected to the login page, where you will be prompted to enter the router’s admin password. If you haven’t changed the default password or set a custom one, leave the field blank and click on Submit. (The default password is blank)
-
Depending on your setup, you may encounter another page for Dashboard users where you’ll need to enter the administrator information provided during the initial setup.
-
Congratulations! You are now logged into the Belkin Router web-based interface, where you can configure the settings according to your preferences.
How to Change WiFi Network SSID and Password?
The WiFi network’s SSID (network name) and password are vital components of any wireless network. If you’re trying to connect to a wireless network, it’s crucial to be aware of these two elements. Lucky for you, accessing this information from the web-based interface of your Belkin router is a breeze. And if you want to change your SSID and password, fear not! We’ll show you how.
Change SSID:
-
Log into the Belkin Web-Based Interface using the aforementioned method.
-
Once logged in, navigate to Wireless > Channel and SSID.
-
In the SSID field, enter the new SSID of your choice.
-
Finally, click on Apply Changes to save your modifications.
The router will now reboot, and voilà, the SSID of your WiFi network will be changed.
Change Password:
-
Log into the Belkin Web-Based Interface using the aforementioned method.
-
Once logged in, go to Wireless > Security.
-
Click on the Allowed Client Type dropdown arrow and select WPA/WPA2.
-
In the Password (PSK) field, enter your desired new password.
-
Click on Apply Changes to save your modifications.
Your router will now reboot, and just like that, the password of your WiFi network will be changed.
How to Factory Reset Your Belkin Router?
Did something go awry with your router’s settings? Or perhaps you’ve forgotten the login password? Fear not! Factory resetting your Belkin router can be the perfect solution. This process will restore all personalized settings back to the factory defaults, helping you start fresh.
Here’s how you can factory reset your Belkin Router. Please ensure your router is powered on before proceeding:
-
Locate the Reset button on your router. Typically, it is located at the back of the device.
-
Grab a trusty needle, paperclip, or any similar object and press and hold the Reset button for 10-15 seconds. Then, let go.
-
After that, your router will reboot, and everything will reset to factory defaults.
Following these simple steps will guarantee a smooth and hassle-free experience with your Belkin router.
Now that you are armed with this knowledge, accessing and modifying your Belkin router’s settings should be a breeze. Remember to save your changes and stay connected with the WiFi network you desire. Happy browsing!