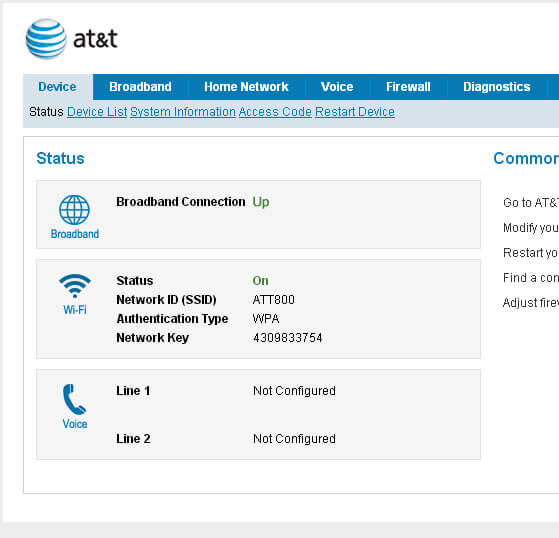
Do you want to take full control of your AT&T router? Are you tired of relying on tech support for every little tweak? Well, you’re in luck! In this article, we’ll show you how to access your AT&T router’s web interface, change your WiFi SSID and password, and even perform a factory reset if needed. Get ready to become the master of your own digital domain!
Accessing the AT&T Router Web Interface
To get started, make sure your PC is directly connected to your AT&T router. It doesn’t matter if you’re using an Ethernet cable or a WiFi network. Once you’re all set up, follow these simple steps:
- Open your favorite web browser on the PC that’s connected to your AT&T router.
- Open a new blank tab and type in the default gateway address of AT&T routers:
http://192.168.1.254. - Hit Enter and voila! You’ll be taken to the AT&T router log-in page.
- Now, enter the username and password to log into the router. Most AT&T routers have the following default credentials:
- Username: blank space
- Password: attadmin
If you can’t remember the default login details, don’t worry! You can usually find them printed on a label at the back or side of your router.
- Once you’ve entered the login credentials, hit Enter and you’ll be logged into the AT&T Router Web Interface. Welcome to the control center of your router and home network!
Change AT&T WiFi SSID & Password
By default, every router comes with a random WiFi SSID and password, usually printed on a label on the router itself. However, this information can be hard to remember and potentially expose you to attackers. That’s why it’s highly recommended to change them. Here’s how you can do it via the Router Web Interface:
- Log in to the AT&T Router Web Interface using the method we mentioned above.
- Once you’re logged in, navigate to Settings > LAN > Wi-Fi.
- Scroll down until you find the User Network section.
- To change the SSID, simply type in the new name in the Network Name (SSID) field.
- If you want to change the WiFi password, check the Use Custom Wi-Fi Network Password option and enter the new password in the provided field.
- Finally, click on the Save button to save the changes.
- Please note that after saving the changes, your router will reboot, and you’ll have to rejoin the WiFi network using the new SSID and password.
Factory Resetting Your AT&T Router
There may be instances where you need to restore your AT&T router to its factory default settings. Whether you forgot the admin password, can’t access the router web interface page, or simply messed up the settings, a factory reset is often the solution. Follow these steps to perform a factory reset:
- First, locate the RESET button on your router. It’s usually located at the back, next to the power port.
- Grab a pointy object like a needle, toothpick, or paper clip, and press and hold the RESET button for about 10-15 seconds. Then, let it go.
- You should see the LED lights blink and turn off, indicating that the router is rebooting.
- Now, wait patiently for the router to complete the reboot process, as everything will be reset back to the factory defaults.
By accessing the AT&T router web interface, changing your WiFi SSID and password, and performing a factory reset if necessary, you’ll be able to customize and troubleshoot your router with ease. Say goodbye to relying on others and unleash the power of your AT&T router!
