Have you ever found yourself frustrated by the constant need to switch between cellular data and Wi-Fi networks when you’re on the go? Well, we have a solution for you! Introducing AT&T Wi-Fi Passpoint, a revolutionary hotspot technology that seamlessly connects your device to both AT&T cellular and Boingo Wi-Fi networks. Say goodbye to manual network switching and hello to a world of uninterrupted connectivity.
What is AT&T Wi-Fi Passpoint?
AT&T Wi-Fi Passpoint is a cutting-edge technology that automates secure roaming between AT&T cellular and Boingo Wi-Fi networks. By utilizing WPA2/WPA3 encryption, it ensures your connection remains secure as you switch between Passpoint-certified Wi-Fi networks. The best part? AT&T subscribers can enjoy the benefits of this service at no additional charge.
Access Passpoint Secure Network
With AT&T Wi-Fi Passpoint, you gain access to the Passpoint Secure network, available at over 40 Boingo airports and nearly 150,000 TWCWi-Fi Passpoint hotspots nationwide. Whether you’re traveling for business or pleasure, you can stay connected with ease.
How to Connect to AT&T Wi-Fi Passpoint?
Connecting to AT&T Wi-Fi Passpoint is a breeze. Just follow these simple steps:
- Go to your device’s Settings and turn on Wi-Fi.
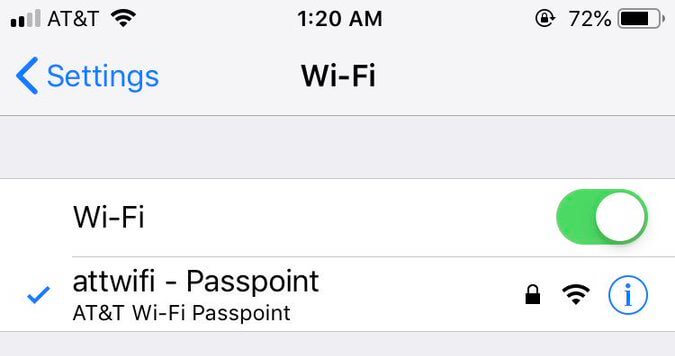
- Select the “attwifi-Passpoint” Wi-Fi network.

- Voila! You are now connected to AT&T Wi-Fi Passpoint.
Unable to Connect to AT&T Wi-Fi Passpoint?
Encountering issues while trying to connect? Don’t worry; we’ve got you covered.
Make sure the “Boingo Passpoint Profile” is installed on your device. Visit passpoint.boingo.com in your browser to download the profile. Enter your system password and install the profile when prompted.
For iOS devices:
- Passpoint is a built-in feature on iOS 10+ devices. To confirm, go to Settings > General > Profiles. If the “Passpoint Secure” Profile is not installed, proceed to download and install it. If the profile is already installed, it is recommended to delete and reinstall it.
For Android devices:
- Go to Settings.
- Tap Network and Internet > Wi-Fi > Wi-Fi Settings.
- Tap Advanced or More.
- Turn on Passpoint or Hotspot 2.0 under Advanced Settings.
For OSX / Mac Laptop devices:
- Download and select Install.
- Enter your system password if prompted.
- Select Install.
Rest assured, Passpoint works with all Hotspot 2.0 capable devices, including those running Android 6.0, Windows 10, iPhone 5 (or higher), iPad 3rd generation (or higher), iPad Air, all iPad Mini models, and Macs running OSX Mavericks (or higher).
How to Disable AT&T Wi-Fi Passpoint Auto-Join?
If you no longer wish to use AT&T Wi-Fi Passpoint or want to disable the auto-join feature, follow these instructions:
For iOS:
- Turn off Wi-Fi.
- Next to the attwifi-Passpoint Wi-Fi network, tap the “i” icon.
- Select “Forget This Network” and disable auto-join.
- Alternatively, go to Settings > Wi-Fi > Auto-Join Hotspot and select “Never” or “Ask to Join.”
- If you have no plans to use the service again, delete the Passpoint Secure Profile from your phone.
- If auto-join persists, go to Settings > General > Transfer or Reset iPhone > Reset > Reset Network Settings.
For Android:
- Tap on the Wi-Fi Network and click “Forget Network” to disable auto-connect.
- Go to Settings > Network and Internet > Wi-Fi > Wi-Fi Settings > Advanced or More.
- Turn off Passpoint.
Embrace Seamless Connectivity with AT&T Wi-Fi Passpoint
AT&T Wi-Fi Passpoint offers a whole new level of convenience for staying connected. No more manual network switching, no more hassle. With Passpoint, you can effortlessly enjoy uninterrupted Wi-Fi connectivity wherever you go. So, why wait? Connect to AT&T Wi-Fi Passpoint today and experience the future of wireless connectivity!
Disclaimer: AT&T Wi-Fi Passpoint requires an active AT&T subscription. Availability may vary depending on location.