Are you having trouble accessing your Intelbras router settings? Do you need to change your Wi-Fi password or network name? Look no further! In this article, we’ll show you how you can effortlessly configure your Intelbras router and customize your wireless settings.
Logging in to your Intelbras router
To get started, you’ll need to log in to your Intelbras router. Follow these simple steps:
- Open a browser and enter http://10.0.0.1 in the address bar.
- Enter the username and password as “admin” and click on the login button.
- Voila! You’re now logged in to your Intelbras router settings.
Changing your Wi-Fi Password and Network Name
Now that you’re logged in, let’s proceed with changing your Wi-Fi password and network name. Depending on the type of Intelbras router you have, the process may vary slightly. Here’s a step-by-step guide for different models:
Intelbras WRN 240, WRN240i or WRN342
- Open a browser and enter http://10.0.0.1 in the address bar.
- Enter the username and password as “admin” and click on the login button.
- Select “Wireless” followed by “Configurações”.
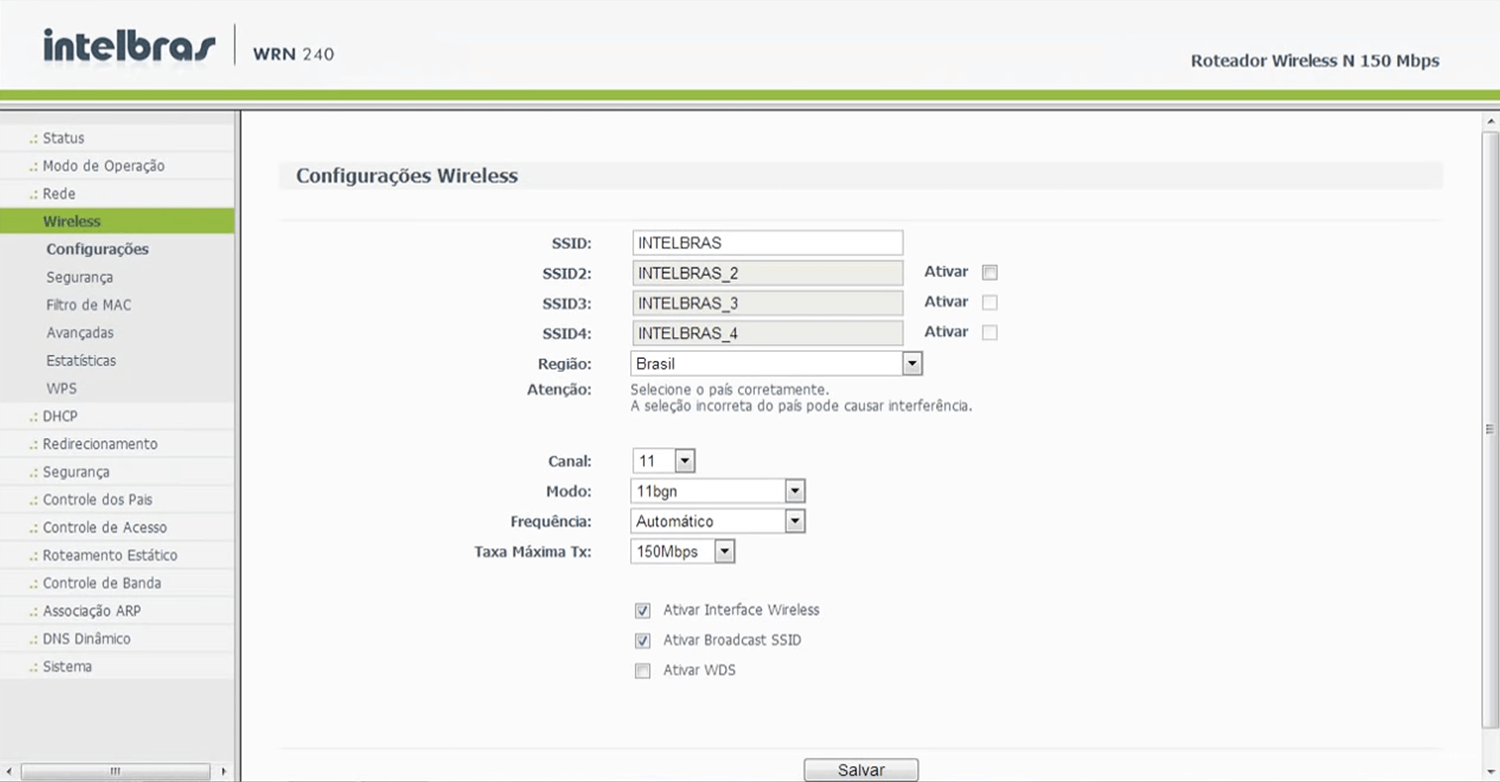
- Enter your desired Wi-Fi network name in the “SSID” field and click “Salvar”.
- Navigate to “Wireless” and then “Segurança”.
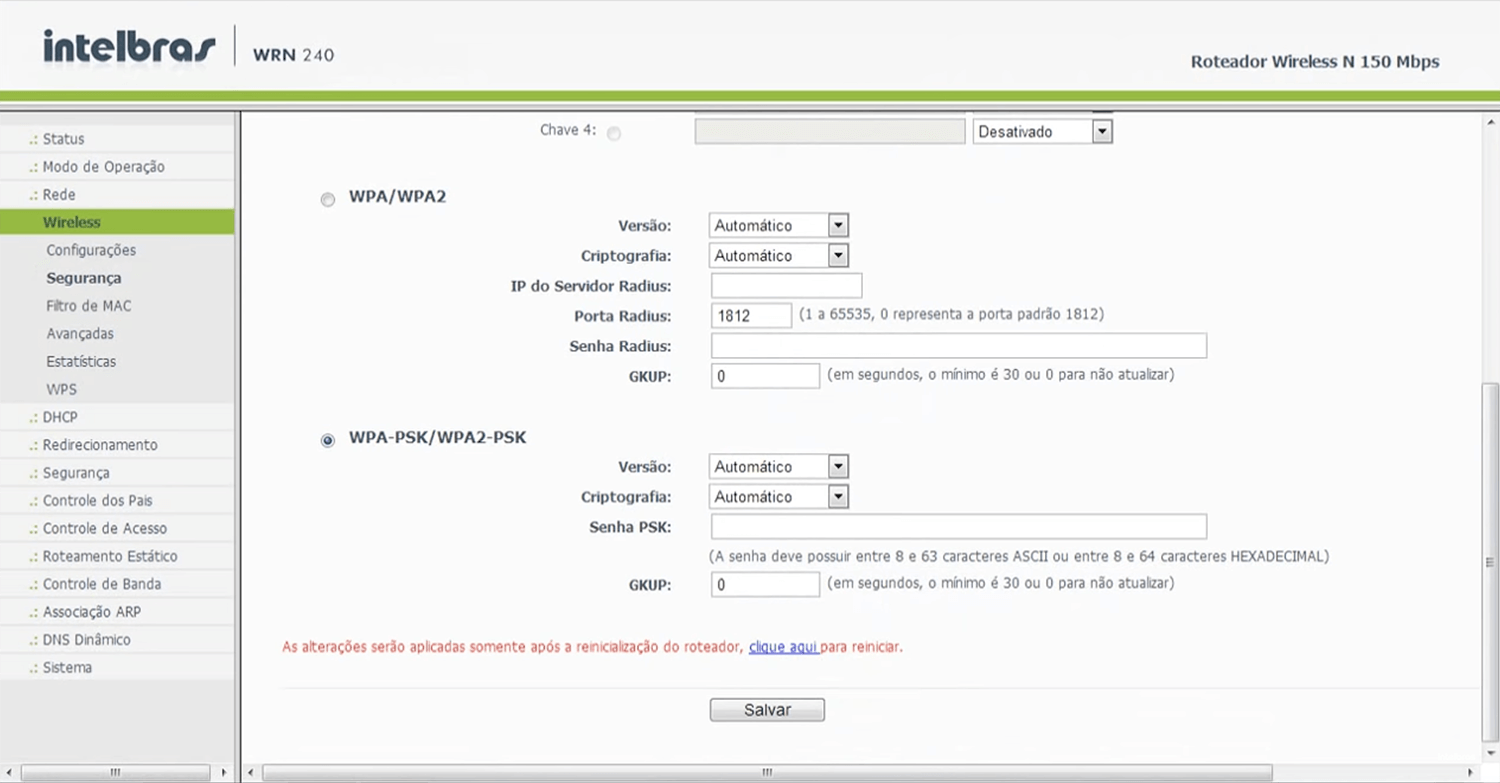
- Choose “WPA-PSK/WPA2-PSK” as the security mode.
- Enter your new Wi-Fi password in the “Senha PSK” field and click “Salvar”.
Intelbras RF 301K
- Open a browser and enter http://10.0.0.1 or http://meuintelbras.local in the address bar.
- Enter the username and password as “admin” and click on the login button.
- Select “Configuração da rede Wi-Fi”.
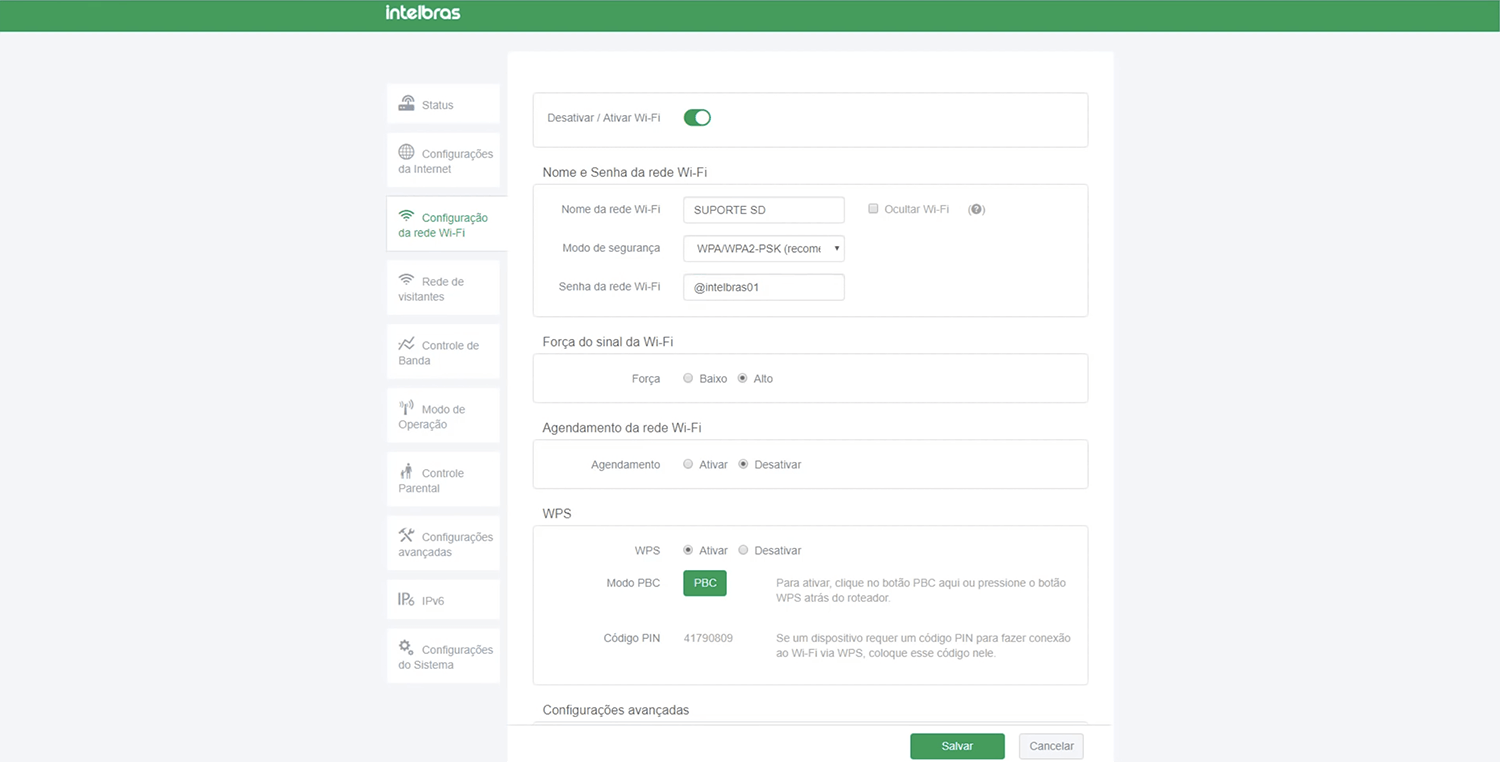
- Enter your desired Wi-Fi network name in the “Nome da rede Wi-Fi” field.
- Enter your new Wi-Fi password in the “Senha da rede Wi-Fi” field.
- Click “Salvar”.
Intelbras IWR 1000N / IWR 3000N
- Open a browser and enter http://10.0.0.1 or http://meuintelbras.local in the address bar.
- Enter the password as “admin” and click on “Acessar”.
- Select “Nome e senhas” followed by “Nome da rede Wi-Fi”.
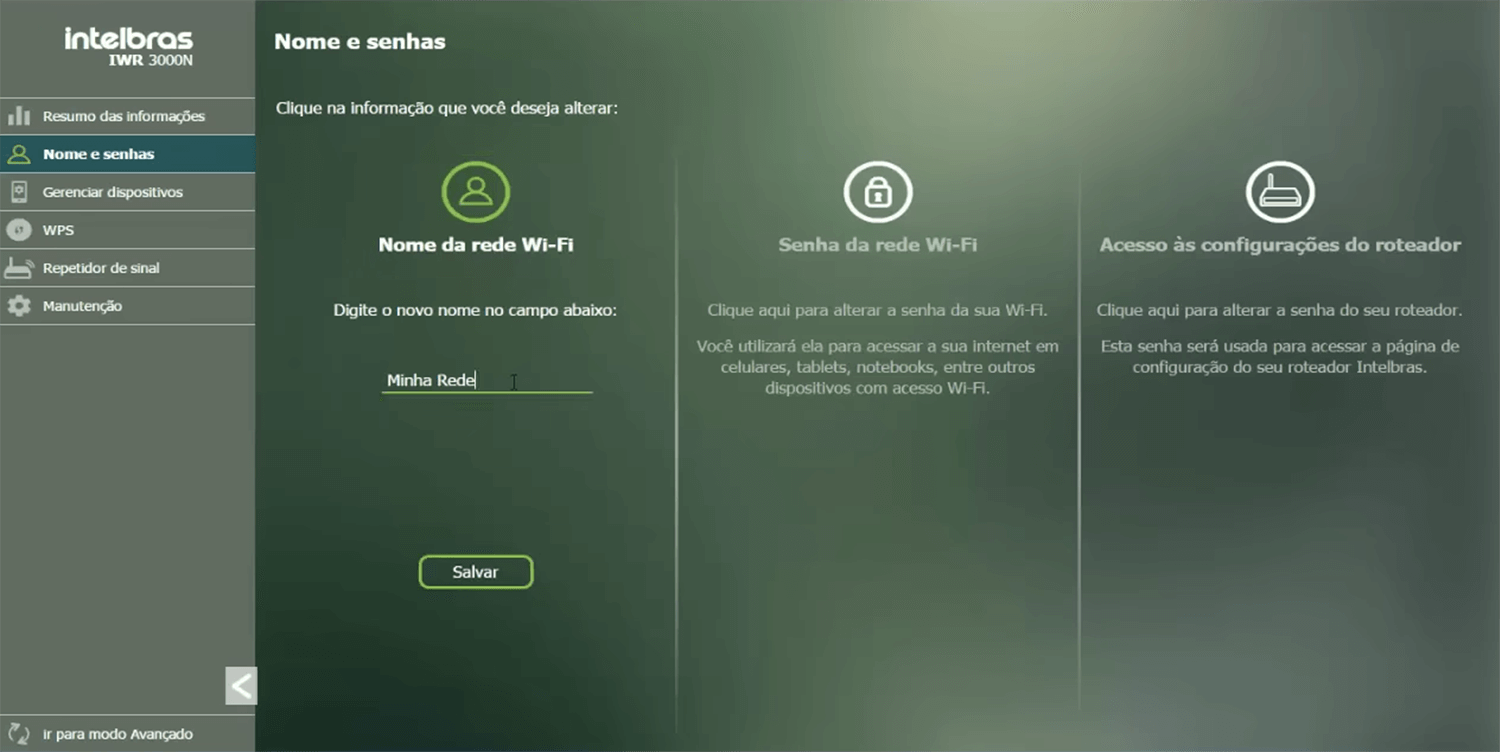
- Enter your desired Wi-Fi network name in the “Nome da rede Wi-Fi” field and click “Salvar”.
- Select “Nome e senhas” followed by “Senha da rede Wi-Fi”.
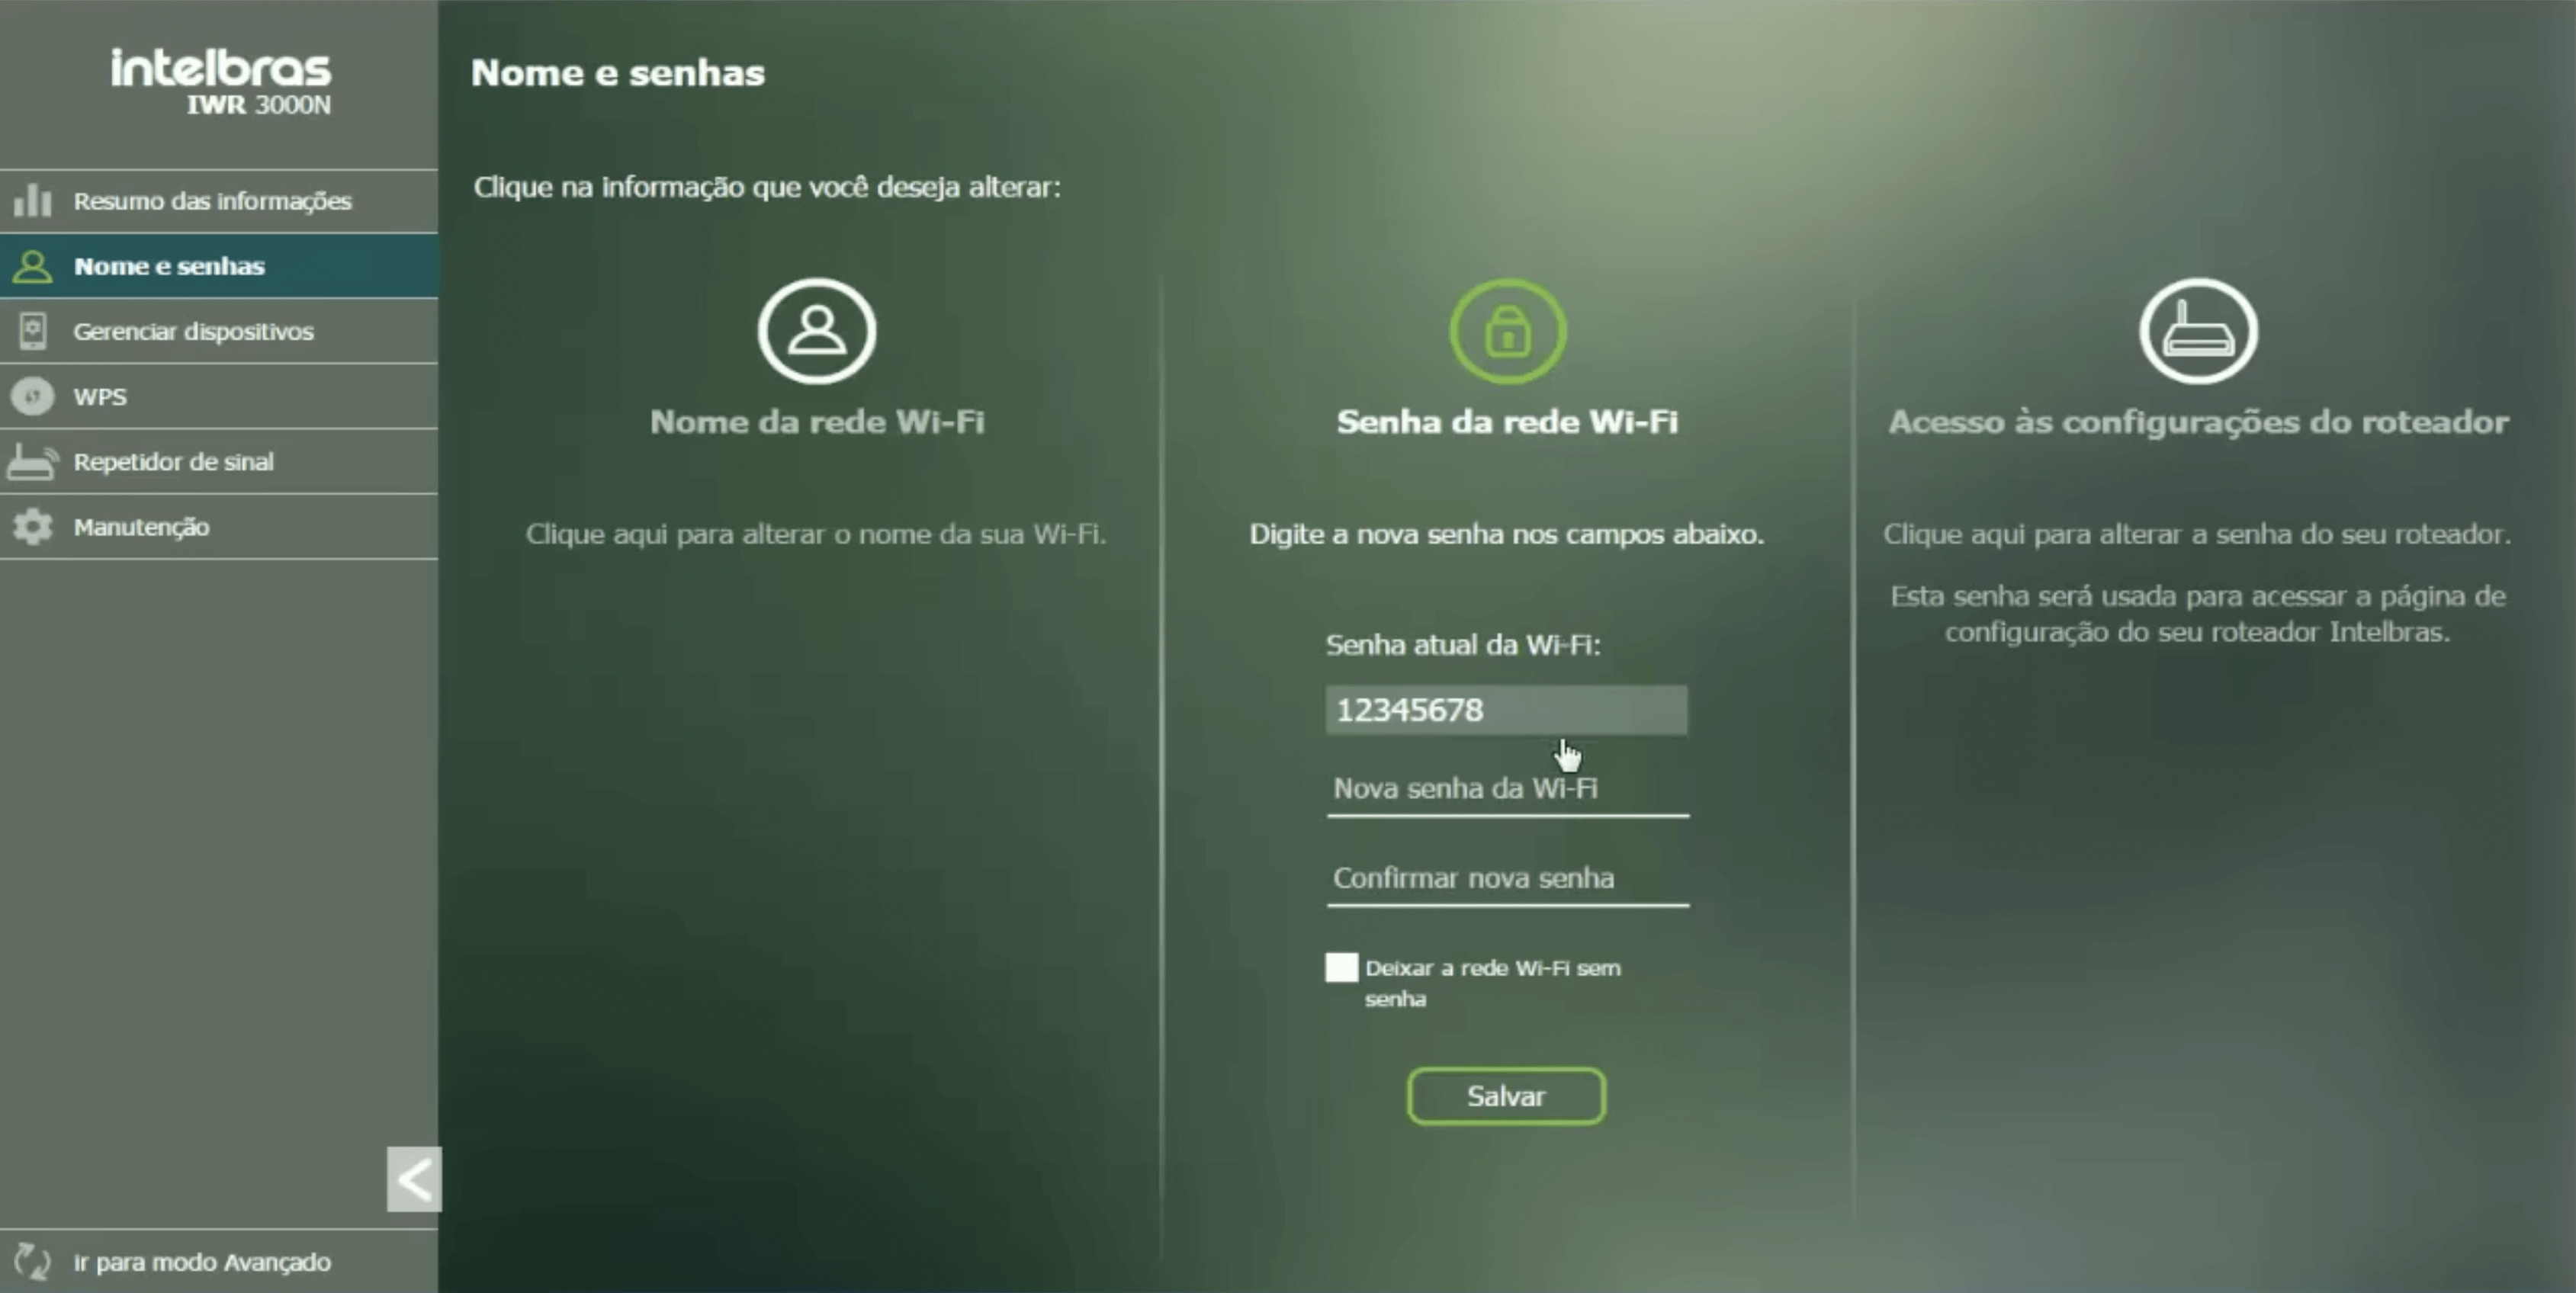
- Enter your new Wi-Fi password in the “Nova senha da Wi-Fi” field and click “Salvar”.
Intelbras WRN 150
- Open a browser and enter http://10.0.0.1 in the address bar.
- Enter the username and password as “admin” and click on “Acesso”.
- Select “Wireless” and then “Configurações”.
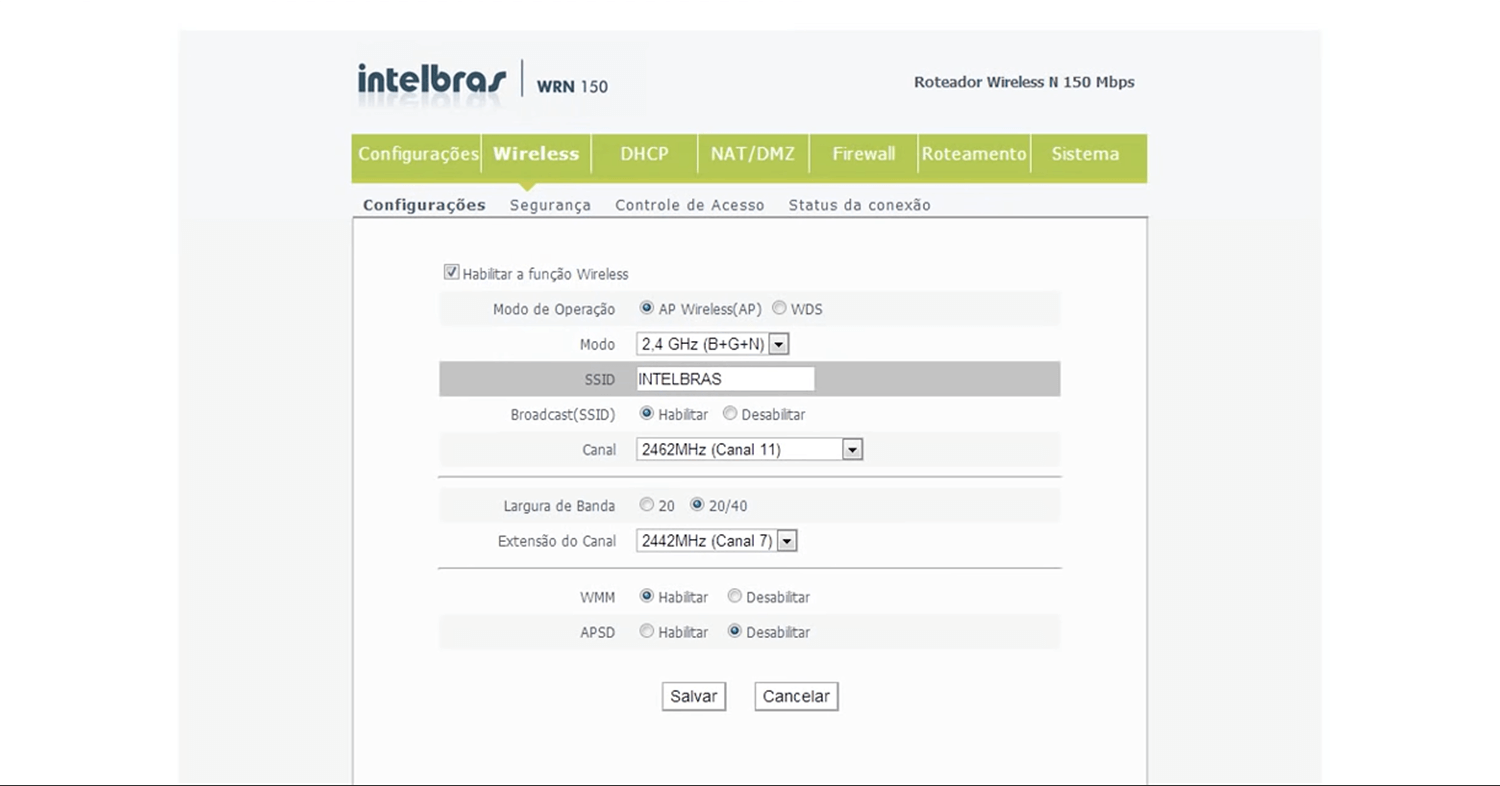
- Enter your desired Wi-Fi network name in the “SSID” field and click “Salvar”.
- Navigate to “Wireless” and then “Segurança”.
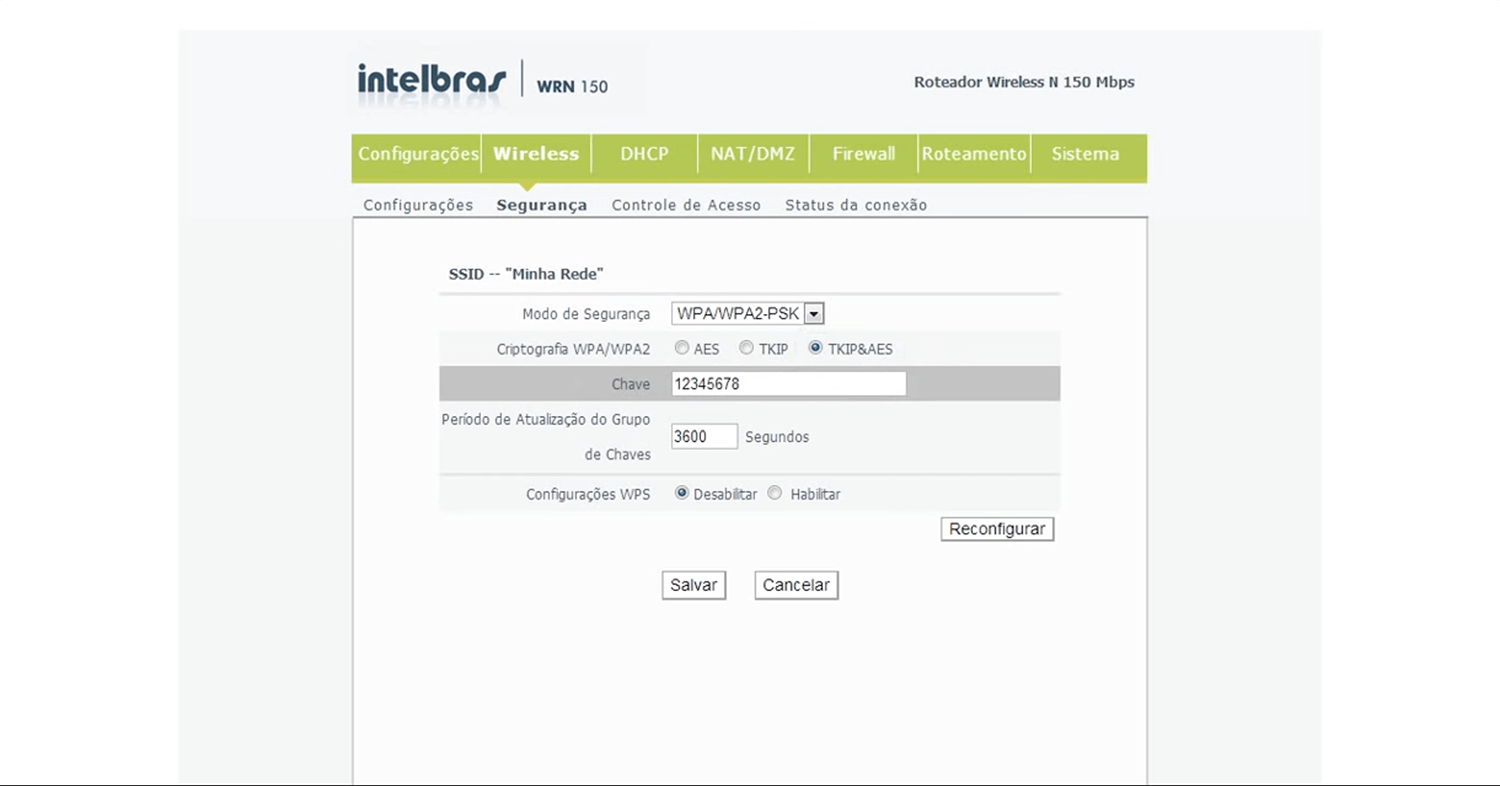
- Select “WPA-PSK/WPA2-PSK” as the security mode.
- Enter your new Wi-Fi password in the “Chave” field and click “Salvar”.
Intelbras W5-1200G
- Open a browser and enter http://10.0.0.1 or http://meuintelbras.local in the address bar.
- Enter the username and password as “admin” and click on “Entrar”.
- Open the menu and select “Rede”.
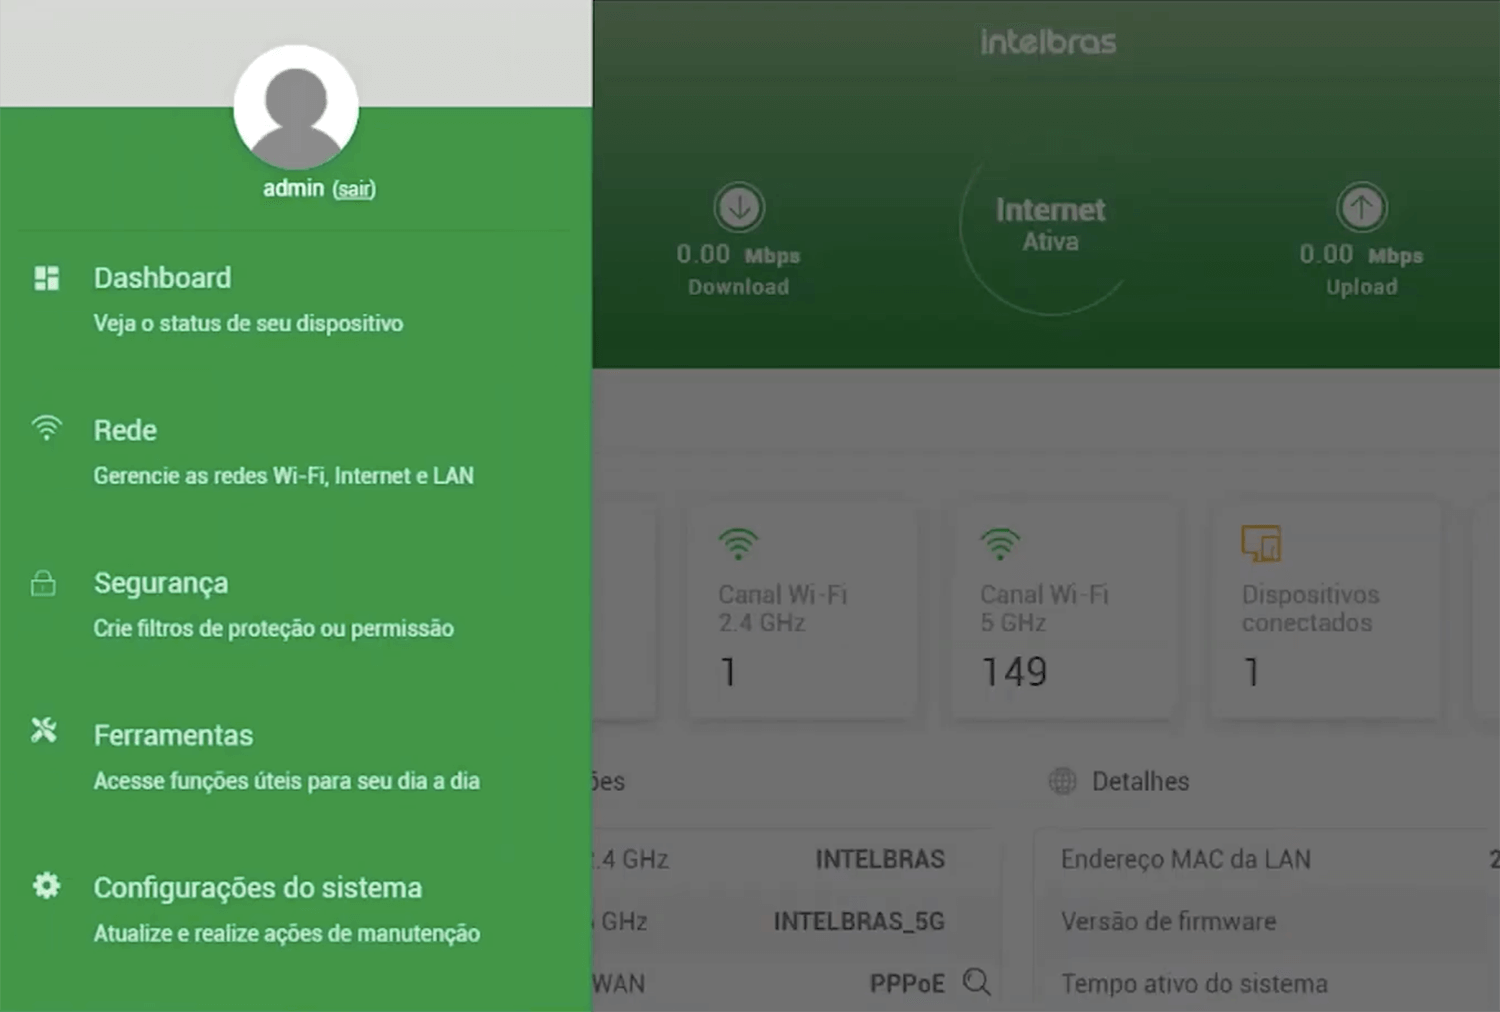
- Enter your desired Wi-Fi network name in the “Nome da rede” field.
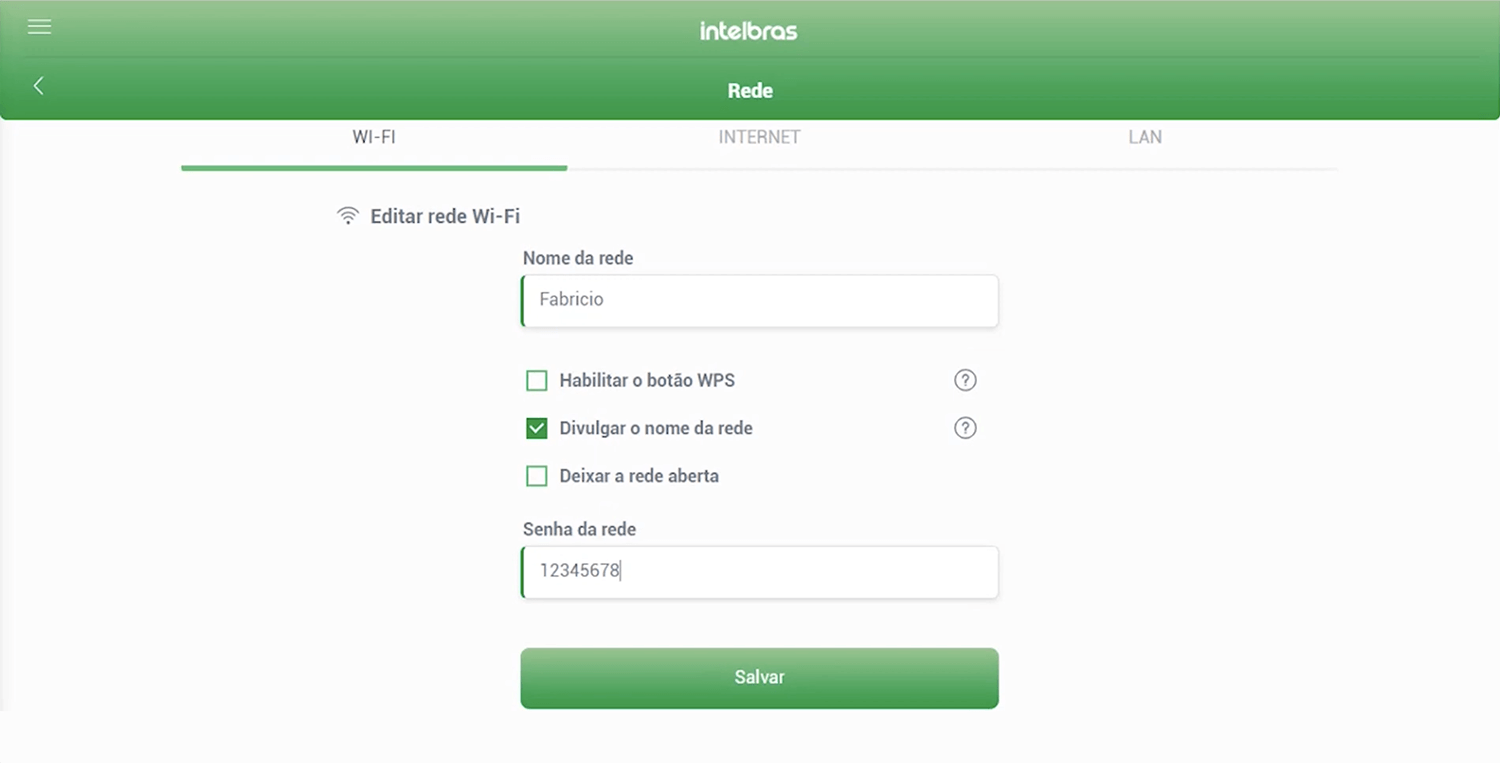
- Enter your new Wi-Fi password in the “Senha da rede” field.
- Click “Salvar”.
Congratulations! You’ve successfully configured your Intelbras router to your preferences. Enjoy seamless internet connectivity with your personalized settings. Feel free to experiment with different network names and passwords to find the perfect fit for your needs. Happy browsing!