Welcome to the world of True Gigatex Fiber! If you’re looking to enhance the security of your Wi-Fi network, change your network name, or simply explore the default router settings, you’ve come to the right place. In this article, we’ll guide you through the process step by step, ensuring that you can easily navigate the True Gigatex Fiber web-based user interface. So make yourself comfortable, grab a cup of coffee, and let’s dive in!
Logging in: Unveiling the Gateway to True Gigatex Fiber
To begin your journey, we first need to access the True Gigatex Fiber settings. Here’s how:
- Open your favorite browser and type http://192.168.1.1 in the address bar.
- Enter the Username: admin and Password when prompted, then click on the Login button.
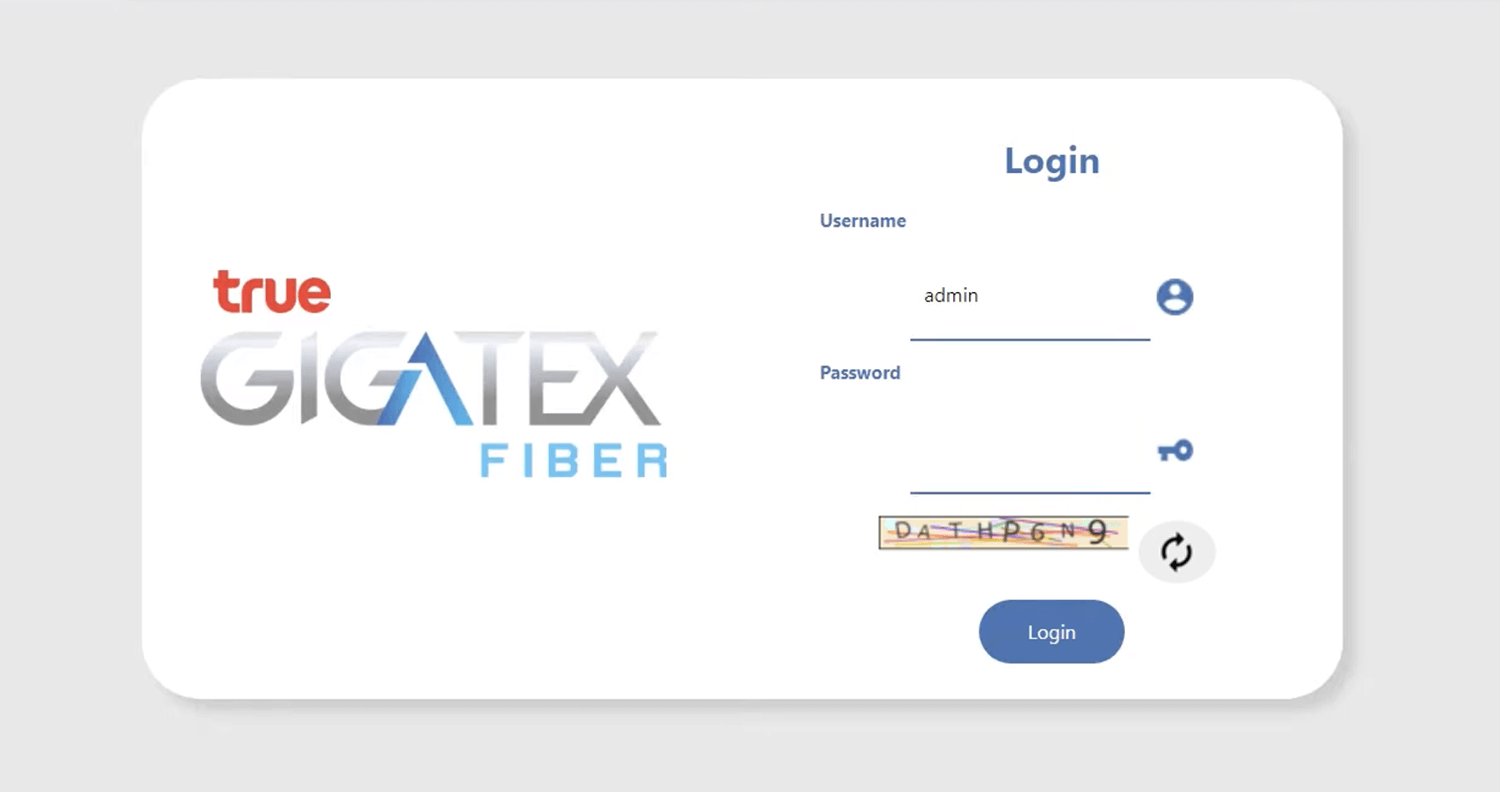
- Congratulations! You are now logged into the True Gigatex Fiber settings.
Changing Wi-Fi Password and Network Name: Adding Your Personal Touch
If you want to customize your Wi-Fi network name and password to something more memorable or secure, follow these easy steps:
T3 ST-244F
- Access the True Gigatex Fiber settings by typing http://192.168.1.1 in your browser’s address bar.
- Enter the Username: admin and Password when prompted, and click Login.
- Select WLAN > WLAN 5GHz > Basic Setting.

- Enter your desired Wi-Fi Network Name in the SSID field, and click Apply Changes.
- To change the Wi-Fi Password, navigate to WLAN > WLAN 5GHz > Security.
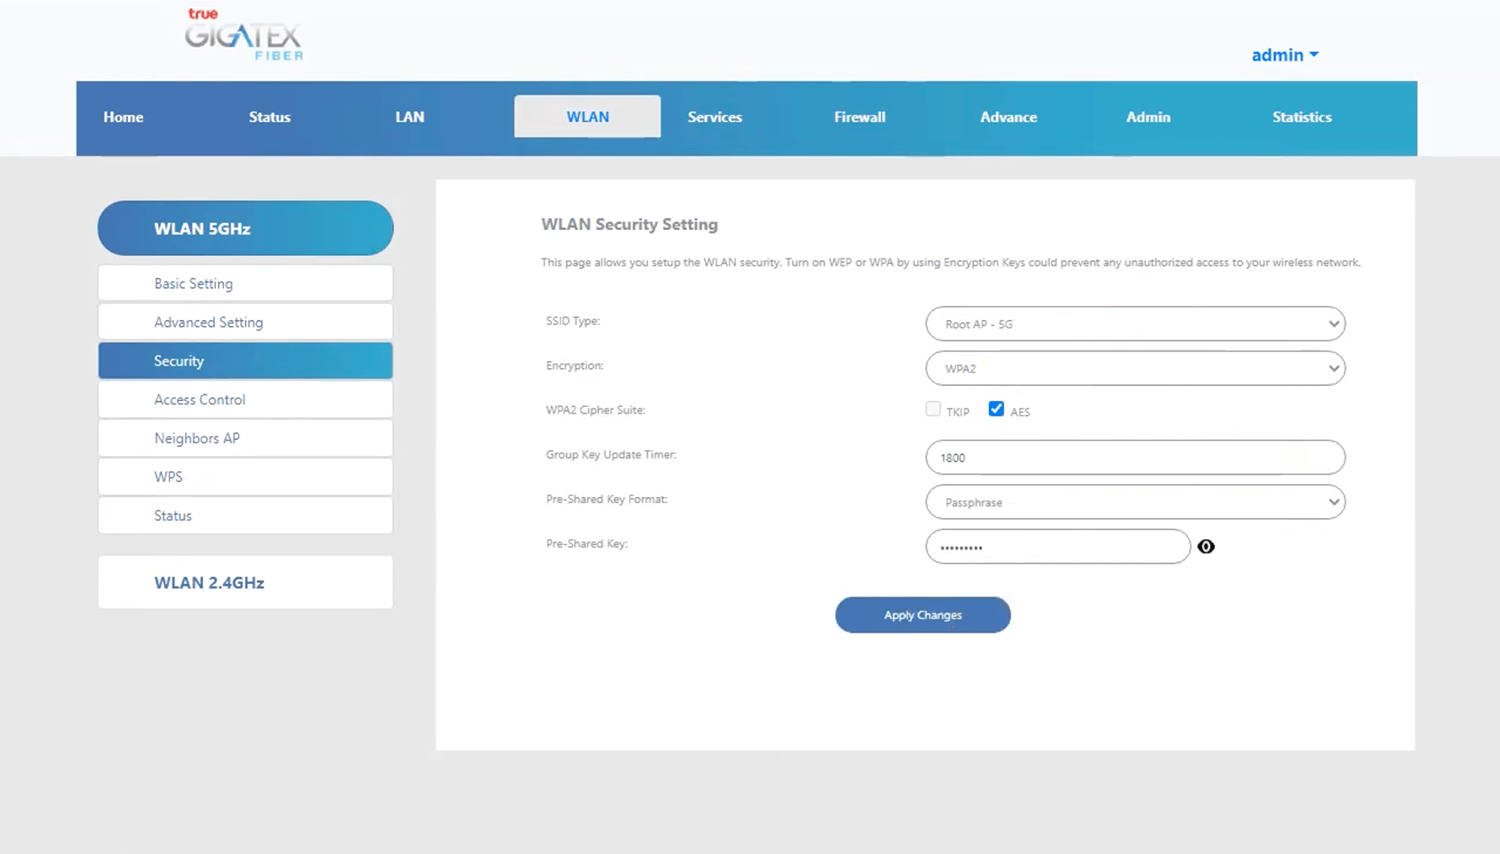
- Enter the new Wi-Fi Password in the Pre-Shared Key field, and click Apply Changes.
ZTE F688
- Open your browser and type http://192.168.1.1 in the address bar.
- Sign in with the Username: admin and Password.
- Select Local Network > WLAN > WLAN Basic > WLAN SSID Configuration.
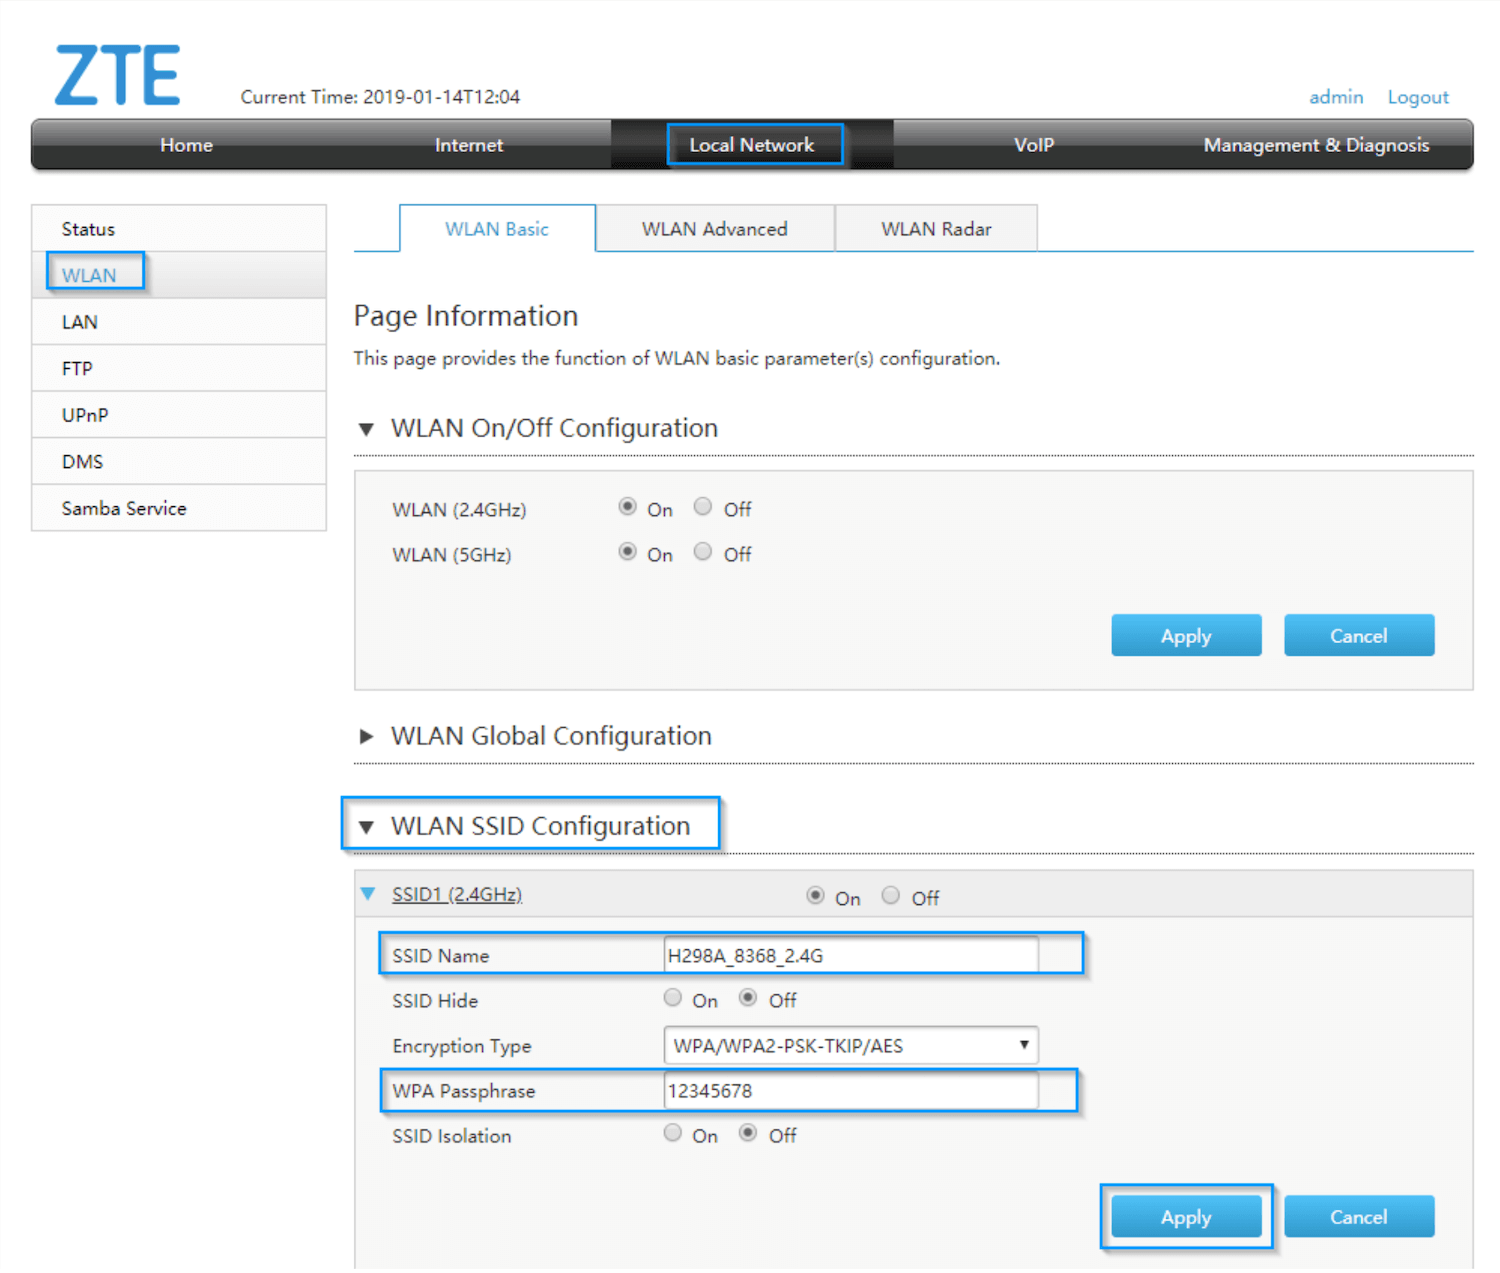
- Enter your desired Wi-Fi Network Name in the SSID Name field.
- Set the desired Wi-Fi Password in the WPA Passphrase field.
- Click Apply Changes.
Huawei HG8247W5
- Open your browser and visit http://192.168.1.1.
- Log in using the Username: admin and Password.
- Select Advanced > WLAN > 2.4G Basic Network Settings.
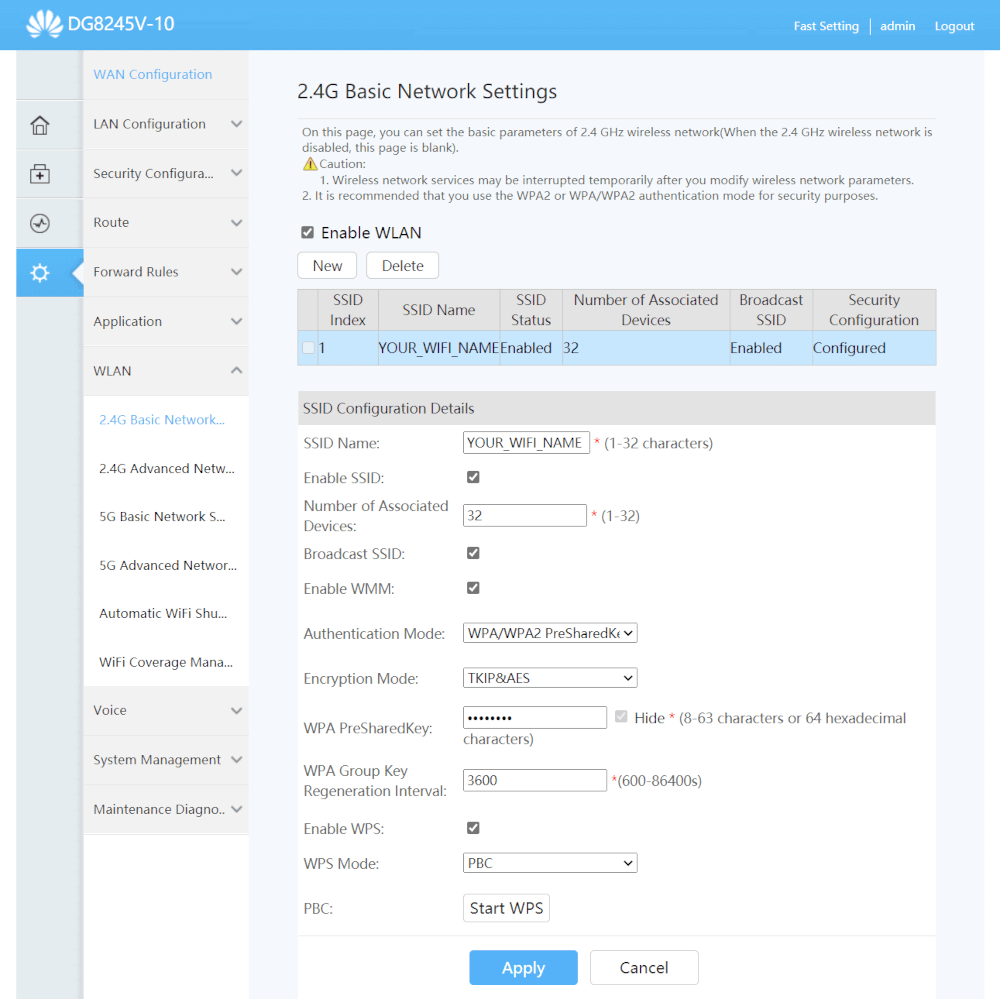
- Enter your desired Wi-Fi Network Name in the SSID Name field.
- Set the desired Wi-Fi Password in the WPA PreSharedKey field.
- Click Apply.
Skyworth GN542VF
- Open your browser and navigate to http://192.168.1.1.
- Sign in with the Username: admin and Password.
- Select Network > WLAN 5G.
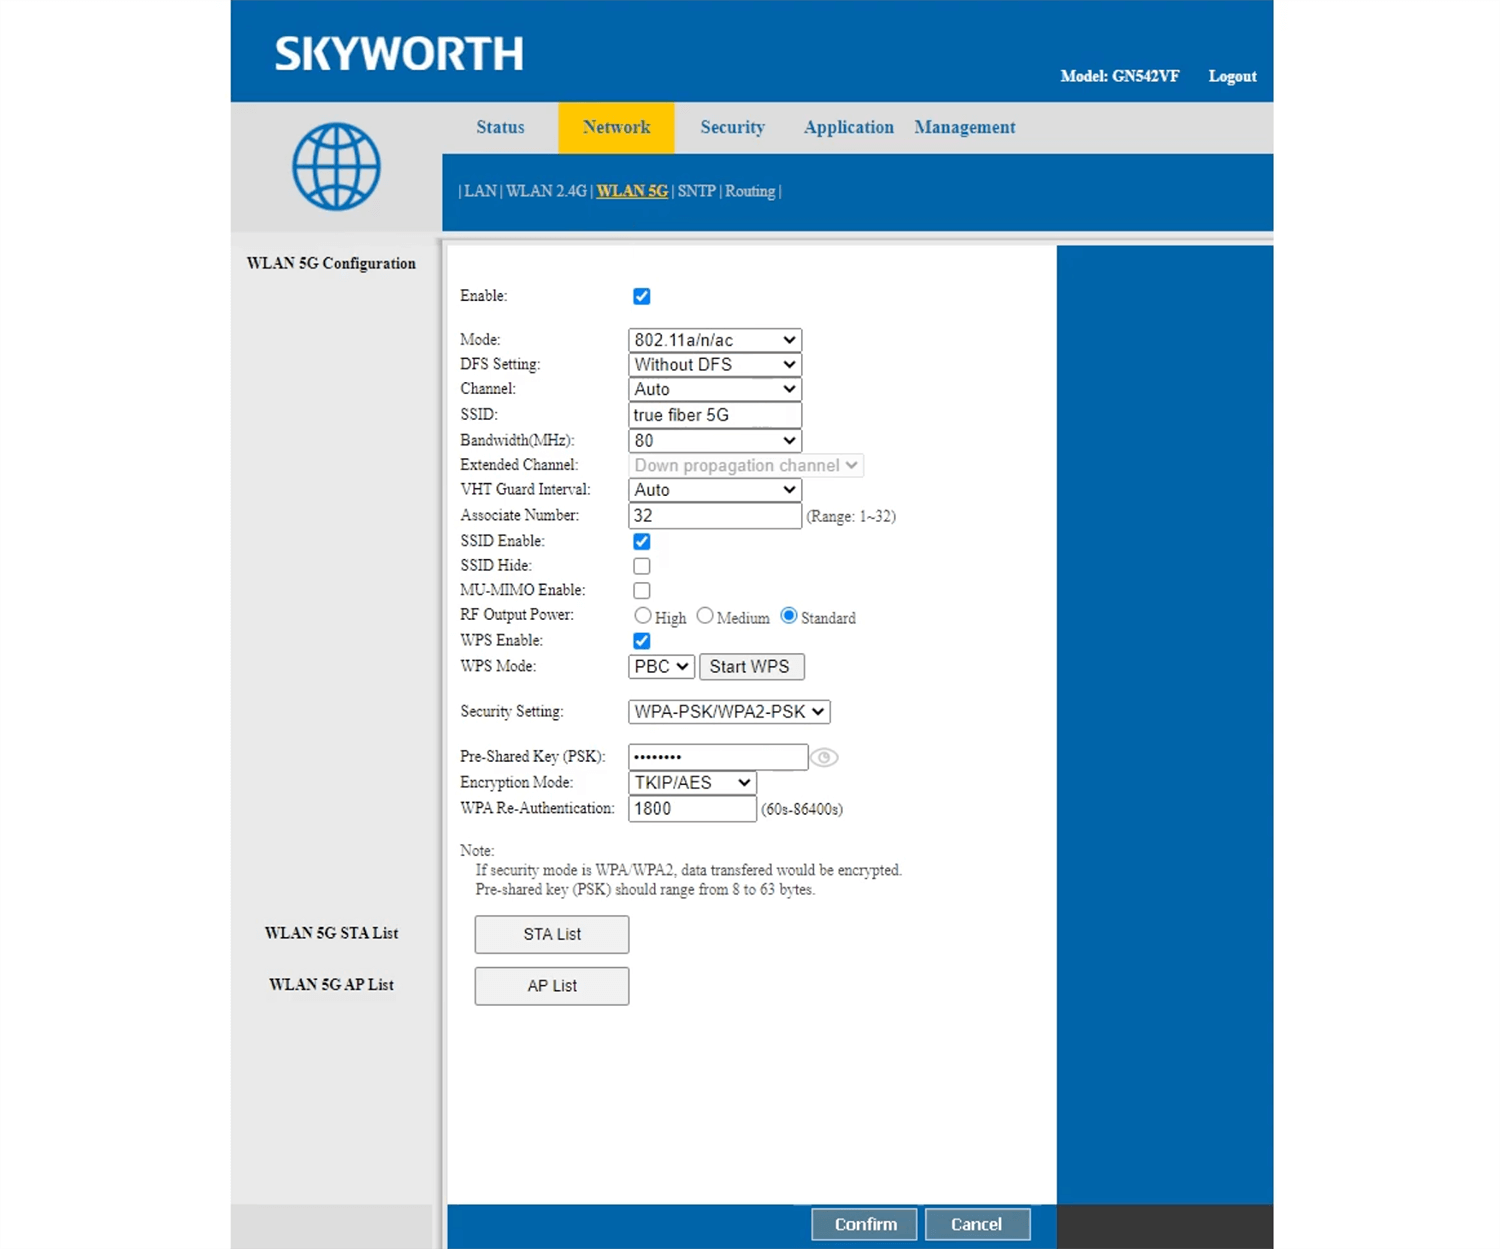
- Enter your desired Wi-Fi Network Name in the SSID field.
- Set the desired Wi-Fi Password in the Pre-Shared Key (PSK) field.
- Click Submit.
Huawei HG8247H
- Open your browser and go to http://192.168.1.1.
- Log in using the Username: admin and Password: password.
- Select WLAN > WLAN Basic Configuration.
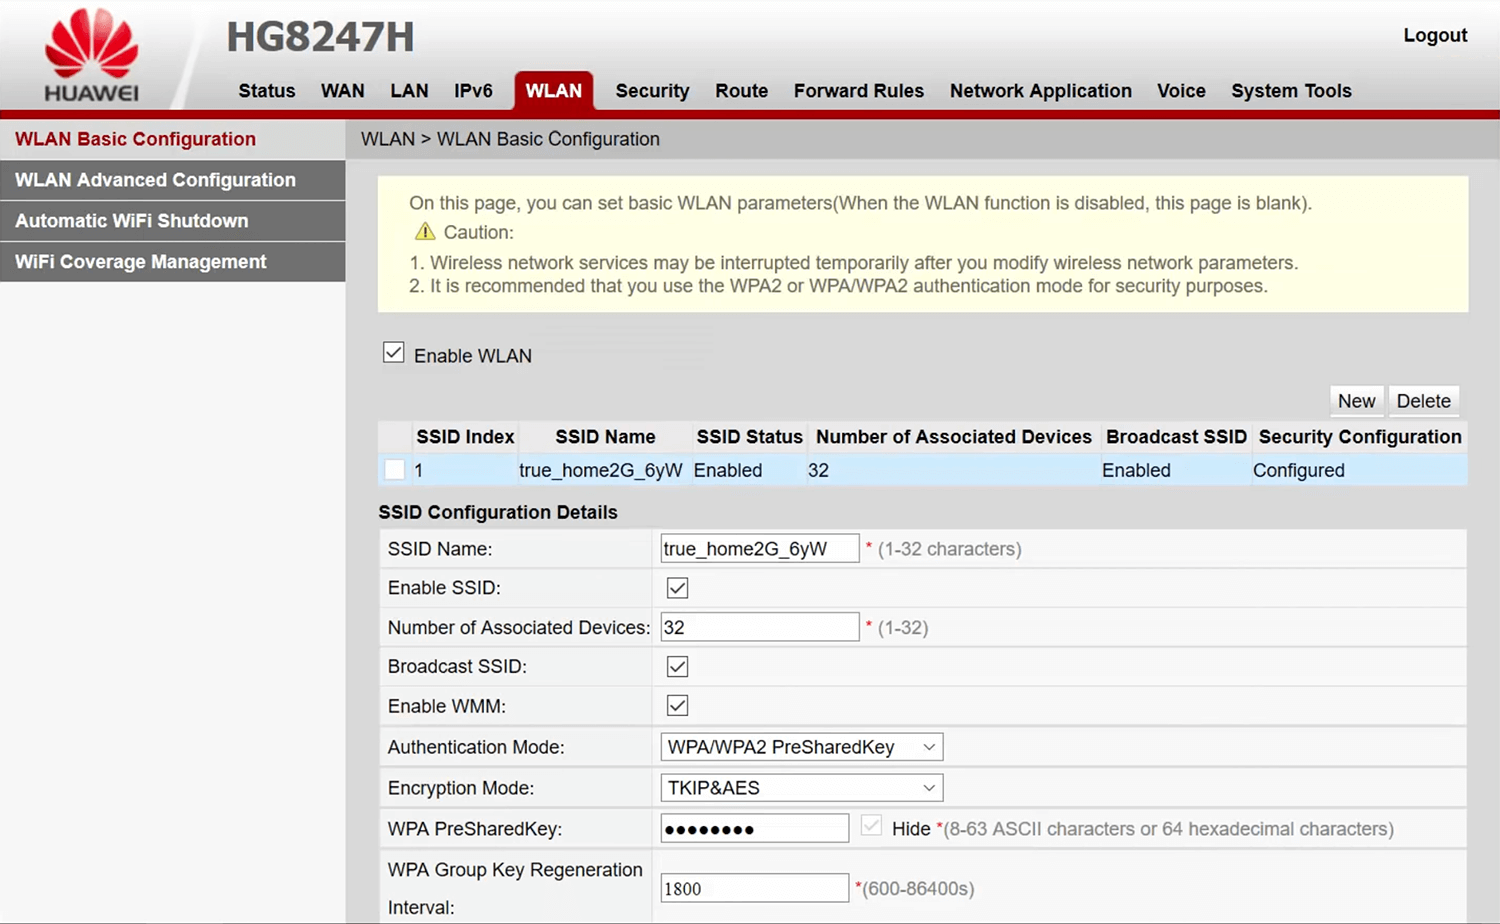
- Enter your desired Wi-Fi Network Name in the SSID Name field.
- Set the desired Wi-Fi Password in the WPA PreSharedKey field.
- Click Apply.
True IoT Router Wi-Fi
- Open your browser and type http://192.168.0.1 in the address bar.
- Log in using the Username: admin and Password: password.
- Select การตั้งค่า > การตั้งค่า Wi-Fi > การตั้งค่าพื้นฐาน.
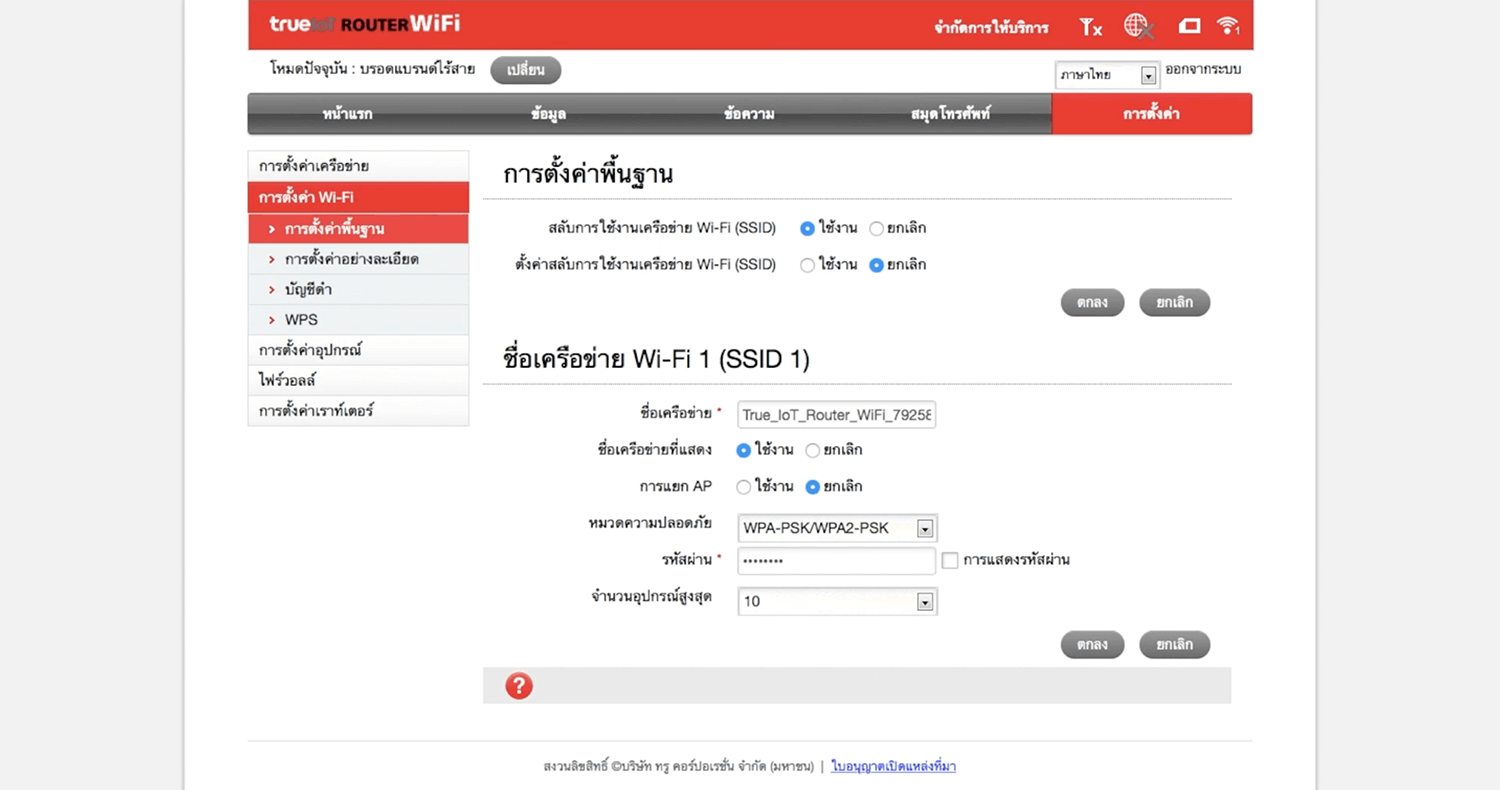
- Enter your desired Wi-Fi Network Name in the ชื่อเครือข่าย field.
- Set the desired Wi-Fi Password in the รหัสผ่าน field.
- Click ตกลง.
And there you have it! By following these simple steps, you can easily login to your True Gigatex Fiber settings and customize your Wi-Fi network name and password to better suit your needs. Enjoy a secure and personalized internet experience!
Remember, your cyber safety is important. Always keep your login credentials confidential and choose strong passwords. Happy browsing!
Disclaimer: The information provided in this article is for educational purposes only. We do not endorse any specific actions or promote unauthorized access to network settings.